10 essential tips for team work with Eclipse
You’re working with Eclipse and you may be having a hard time managing all your developers’ positions. Setting up a new position takes time. You may have questions about work organization. What can you do to improve things?
Here are 10 essential tips to help you standardize your developers’ work.
1. Installation of Eclipse
In order to develop properly, you must use the most up-to-date version of Eclipse. This version can be downloaded from the Eclipse website: https://www.eclipse.org/downloads/
If the downloaded version is not sufficient (for example an eclipse modeling does not contain the webtools or svns), you will need to manage the added tools. There are several ways to do this:
- list the complementary tools’ site updates to install in a wiki and send the information
- install the complements in a newly downloaded Eclipse and have this version installed (management of the different platforms if there are developers on windows/linux, etc…)
- suggest an internal site update that groups together all the tools to install
In any case, it is key to ensure that all developers work with the same tool versions.
2. Workspace management
Eclipse manages projects in a workspace to which some parameters, called preferences, are associated.
As every project has different client-specific characteristics, one workspace per project is required.
If you are developing on maintenance branches, a dedicated workspace for this branch is also required.
You can switch from one workspace to the other by using the command ‘File->Switch Workspace…’.
You can copy a workspace’s preferences to another when you create a new workspace, or import preferences stored in a file once the workspace is created.
3. Java settings
In a multi-developer environment, machines and configurations are often different. In order to avoid configuration problems, it is important to set certain parameters right from the start.
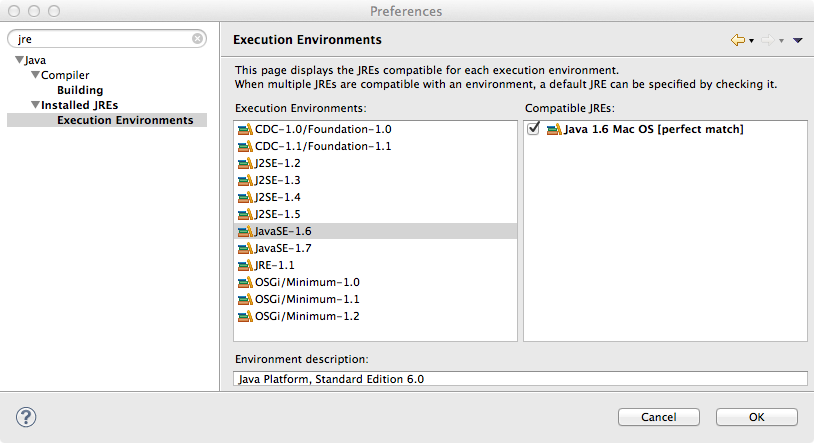
In a Java environment, you can make a Java version (J2SE-1.5 for example) correspond to a JRE or a JDK installed on your machine. These environments are stored in the current workspace. This is actually one of the very few manual settings needed for every workstation as the others can be shared by saving the preferences (Cf §5):
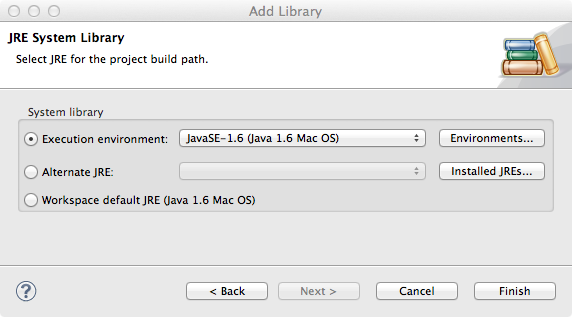
In subsequent Java projects (for the plugins, we can only choose environments) only Java environments can be used and referenced. The current JRE or an alternative JRE must no longer be used:
So if a developer brings up a project through configuration management and JDK 1.5 is set as default, his project will fail and he will have to set the preferences correctly.
4. Code formatting
Another important setting: code formatting rules, which need to be shared between all developers. If these are not set from the start and the files are subsequently delivered in configuration management, they can create problems when making comparisons with previous versions.
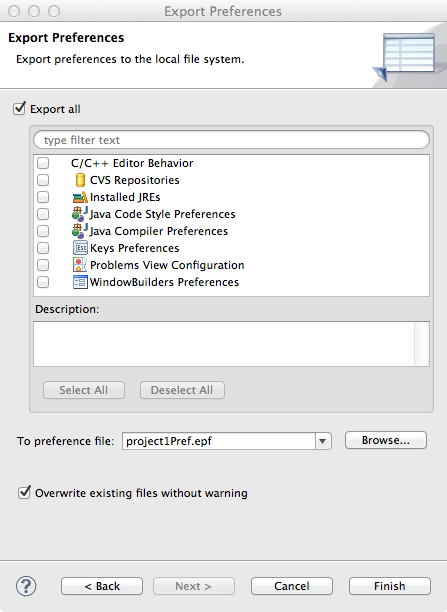
For Java the configuration is done in the preference pages, ideally by importing a shared preference file, specific to the project and shared on the network (the first time it is obtained by doing an ‘export all’):
For example, the default line size – currently set at 80 columns and no longer adapted because of new screen sizes! — can be modified.
5. Sharing workspace preferences
By exporting workspace preferences (Menu Export → Preferences), a project’s common preferences can be shared easily. The epf file created can then be imported again into other workstations.
6. Committing Eclipse management files
In the project directory, Eclipse stores some configuration files that are necessary for it to work. They include:
- the file .project which contains the data on the project
- le .classpath if the project is of Java nature
- le .cproject if the project is in C/C++
- the directory .settings which contains the proprieties of the resources.
These files must be committed to the configuration management database in order to find them on every development workstation.
7. Sharing launch configurations
Whatever the type of project, the launch parameters of a ‘launch configuration’ can be stored in a file. You get to this from the ‘Common’ tab in every launch configuration. A ‘.launch’ file must be stored in a project and can be committed to the configuration management database. By selecting the Run and Debug menus, the other developers will be able to access it directly from the menus.

8. Target platform management
When developing an RCP application, you must configure the workspace’s target platform.
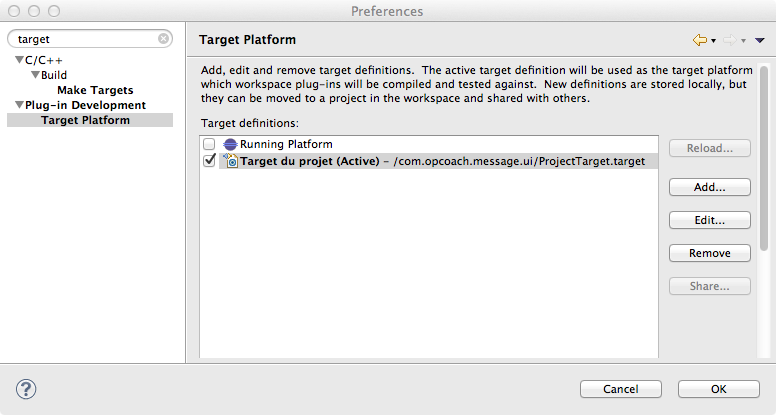
The best way to do this is to create a target file (New Wizard → target Definition), in the main application plugin. Of course, this file will be stored in the configuration management database (cvs, svn…).
In order to allow the shared use of target files, the files should not be referenced locally but rather referenced directly on Eclipse sites, or possibly in a shared and accessible directory.
The target platform preference screen then references all the .target files in the workspace:
9. Use of the ‘working sets’
The workspace may quickly contain several projects, even dozens. ‘Working sets’ enable you to organize the workspace by creating groups and putting projects together. A project may belong to several ‘working sets’ simultaneously.
The working set mode is set in the view package Explorer menu:
This menu contains the commands used to fill the working set with projects.
10. Exporting and sharing a workspace
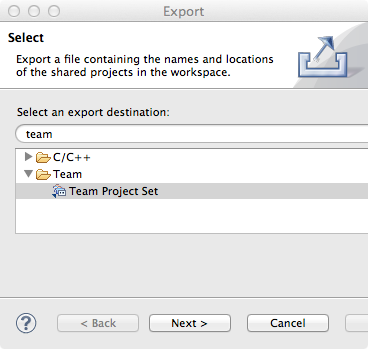
Finally, once the workspace is organized properly using working sets, its content can be exported to a ‘Team Project Set’ file. This file contains all the URL for accessing the configuration management tool (cvs, svn, …), and all the defined ‘working sets’.
It is enough with one person defining the reference workspace, containing all the projects, organized by working set and exporting this workspace in a stored file on a shared disk:
A new developer can then install a new workstation in 3 steps:
- install an Eclipse with its tools
- import shared preferences
- import the project’s team project set file


